

The Floor That’s Easy to Install and Easy to Install Wrong
Luxury vinyl plank (LVP) is marketed as one of the most DIY-friendly flooring options available — and it genuinely is, relative to hardwood or tile. The click-lock installation system doesn’t require adhesive, nails, or special tools for most of the work. But DIY-friendliness doesn’t mean error-proof, and the installation mistakes that occur with LVP have consequences that range from aesthetic disappointment to floor failure requiring complete reinstallation.
The mistakes that follow are documented consistently by professional installers as the issues they’re most often called in to fix after a DIY LVP installation. Understanding them before installation prevents the expensive discovery of them after.
Skipping Acclimation: The First Mistake
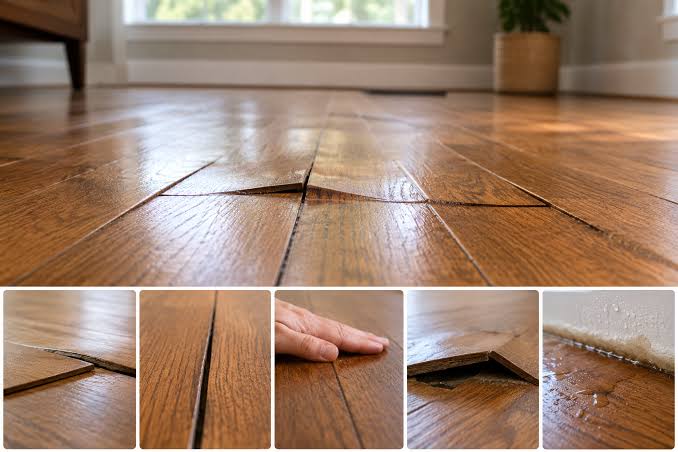
LVP is a plastic-based product with an engineered core that expands and contracts with temperature changes — not as dramatically as solid wood, but measurably. Installing LVP that has been stored in a cold delivery truck and hasn’t acclimated to the home’s temperature can result in a floor that expands after installation as it reaches room temperature, causing buckling, joint separation, or peak stresses in the click-lock connections.
Manufacturer-specified acclimation periods range from 24 to 72 hours in the room where the floor will be installed, at the room’s normal temperature and humidity. This is not optional — it’s the step that allows the product to stabilize before installation so post-installation dimensional change is minimized. Boxes should be stood on end or flat but not stacked directly on each other, allowing air circulation.
Inadequate Subfloor Preparation: The Most Consequential Error
LVP is a floating floor — it’s not fastened to the subfloor, and it spans subfloor imperfections rather than conforming to them. This means that any high spot or low spot in the subfloor becomes a flex point in the LVP above it. A 1/4-inch subfloor hump causes the LVP above it to flex with every footstep, stressing the click-lock connections at that point until they fail. A low spot causes the floor to sound hollow and may eventually crack at the plank.
Check the subfloor flatness with a 10-foot straightedge before installation. Any deviation greater than 3/16 inch over 10 feet needs to be addressed: high spots ground or planed down, low spots filled with self-leveling compound. This subfloor preparation step is the most time-consuming part of most LVP installations and the step most often rushed or skipped in the interest of getting to the visible work.
Insufficient Expansion Gap
LVP expands and contracts with temperature and humidity changes. The expansion gap — the space left between the floating floor and all fixed vertical surfaces (walls, cabinets, door frames, transitions) — allows this movement to occur without the floor buckling or developing joint stress. The standard expansion gap is 1/4 inch at all vertical surfaces; in large rooms or climates with wide temperature swings, 3/8 inch is safer.
The expansion gap is covered by the baseboard or quarter-round trim after installation and becomes invisible. But a gap that’s too small — or that’s compressed by trim installed too tightly — transfers the floor’s expansion force to the joint connections rather than to free space at the wall. This manifests as buckling at the most constrained point in the floor.
Direction of Installation: The Visual Decision That’s Hard to Undo
LVP plank direction significantly affects the visual perception of a room. Planks running parallel to the longest wall make the room appear longer; planks running perpendicular to the longest wall (across the room’s short dimension) make the room appear wider. Planks running parallel to the primary light source (toward the window from which most natural light enters) reduce the visibility of seams, because shadows fall along rather than across the joints.
This decision is made before the first plank is laid and is essentially permanent — changing direction after installation requires complete removal and reinstallation. Plan the direction based on the room’s proportional goals and light source before starting.